Week 4 - Formative Hand-in Week
Some of the most important parts of this project is the snow. Like I've mentioned previously, if the snow doesn't look great then the whole scene doesn't look believable. A way to make something realistic is by showing evidence of history or marks that people would have made. What is one mark left behind on snow? Footprints. Footprints in snow tells you a lot of information, depending on the amount it can tell you if there is a small amount of people or a large number that was in the same location recently. The colour of the snow is another tell tale sign, if there is repeated back and forth which doesn't allow the snow to settle, then it turns into a slush of snow turned into patches of water and ice.
It should be noted that the brown snow is due to both mud/soil from the ground underneath the snow, and also dust or pollutants. I need to consider the location of the base to determine what extra things can affect the snow.
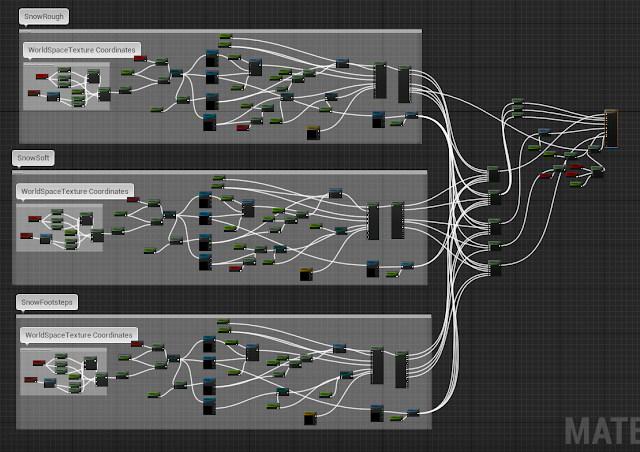
This material is made up of the snow material that I created previously with a new footprint shape I created and stamped in.
Since this metal grid texture is also a flat surface, I wanted to show footprints on certain areas that would have a buildup of snow. Obviously if I covered the whole metal floor with a layer of snow, then you wouldn't be able to tell that its metal.
This is a gif that I made on creating the footprint texture. As you can see it is just built up from small shapes that have parts subtracted or warped, to then create the whole footprint. The pattern of the tread is based on a boot that I found on google images. Also a few things I want to note, I made it so that there is only one type of footprint. This is because I wanted to give the sense of a military base and soldiers would most likely have the same uniform and that makes their footprints fairly similar.
Another small detail I want to point out is the snow that outlines the footprint. Whenever you walk and make a foot print on something like snow it will never be a straight concave shape. To make space for the foot to step down some of the snow surrounding the foot would be dislodged and pushed away making a sort of ridge around the footstep. One thing that I could do to make this much more believable would be to have some random bits of snow clumps/particles near the footsteps. Since the motion of walking would kick up some snow clumps as well.
This is a small texture created for the computer screen. I wanted to make it seem as if its older technology to fit in with the whole military feel. I added horizontal lines to give that old computer look. I wanted the screen to be a blaring red screen to give a sense of danger. Something that could improve this screen would be a screen tear/jitter affect, or even having it animated. Possibly interacting with the computer would play an animation sequence on the screen.
The above image is my master material that I created for this project. So far the components of this is:
1- A standard material which uses one set of textures for the base colour, normals, rgba combined.
2- Tiling and offset parameters which allow tweaking of scale position of the textures.
3- Vertex Blending, to be able to paint between two materials instead of having a single standard material.
I know that my master material is pretty bare bones at the moment, but I will slowly add to this when I figure out more of my pipeline for assets, and how I should even create my textures for the most efficient use in UE4. I know that I will most likely add extra parts such as rotation and world alignment.
Here is the landscape material I have attempted to create. I followed a tutorial to the letter in creating this, however it seems to not work at all. The different materials should be using a heightblend to switch between layer but it doesn't seem to work. For some strange reason there isn't any world displacement (changes in height), the whole landscape texture is flat, and changing the values for the displacement pushes the whole landscape equally.
This is genuinely a really strange problem because I have asked for help from a multitude of different people, and each person doesn't seem to know why it doesn't work. I also opened the UE4 demo level that was provided with the tutorial to showcase the landscape material, and in there it is also dysfunctional. My only idea of why this is happening is that Epic have changed/updated how landscapes are fundamentally made, making older tutorials obsolete (which has happened with other elements of UE4, eg the light units being updated).
Here is a close up of both the snow and the metal floor. Something to point out is that there is a nice transition between the thick snow and metal ramp. This transition is helped with the use of a TemporalDitherAA being plugged into the pixel depth offset of the snow material. The only problem with this and anything that looks fancy is that it can be quite taxing on the engine. However since I am focusing on a portfolio piece, this is completely fine.
Lastly one thing I want to mention is the lighting errors on my landscape. For some strange reason the light maps of the landscape aren't blending nicely between each grid, leading to this harsh edge showing the each grids perimeter. I'm not exactly sure as to why this is happening or how to fix this, but I'm sure with more time I would be able to find some sort of fix.
Beauty Shots of the environment
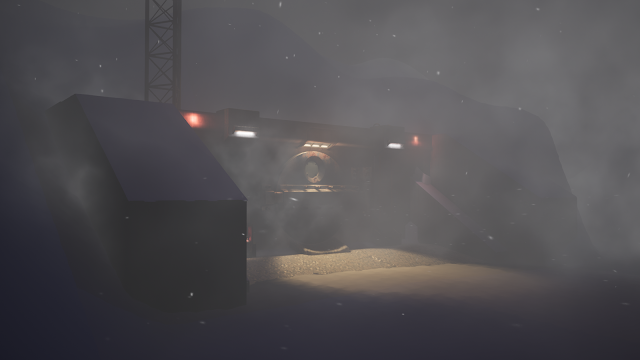
As what is required of us for formative hand-in, I had to take "beauty shots" of my scene. This is basically just pictures of any points of interesting area's and presented in a decent composition.
In summary of this project
My original goals for the project was a good composition, some
technical art and a clear narrative. So far I feel like I have completed the
composition, however my narrative is not there yet. There are many elements
missing from the scene that are needed to tell the story. I think I may have
overestimated what I could do in this project. I spent the whole of week 1
learning and creating the snow and fog in the scene. To create the fog, I had to first learn
Houdini, and then create a smoke texture, and finally apply it to a particle
system in Unreal. Although it frustrates me that I spent so long on this part
of production, I feel like it was necessary as it allowed me to learn much more
about materials and particles in UE4 and was a good introduction to Houdini.
The second week was spent modeling the scene and creating the snow
texture. I had a rough block-out in the first week, but by the end of the
second week I had almost game ready models minus the collision. I also created
the high and low poly versions of the entrance terminal and prepped them for
texturing.
The third week was spent creating materials for the whole of the
environment, and I created a master material that can be changed easily on the
fly within an instance. I also made it so that I could vertex blend between 2
different materials using the red channel. If I had more time I would have
added another vertex blend in the blue channel so that I could paint a layer of
frost onto the materials as well.
I
feel happy that I have learned a lot from this project. But I feel as though
there is so much more that I need and want to do. Somethings I would do
differently if I could do this project again from the start, would be creating
a master material in the beginning. I didn’t do this because I didn’t
necessarily know what I needed at the start. But since I now know what I need,
it would make it so much easier for myself by setting this up in the beginning.
I also learned that I need to be much more thorough with my planning in the
beginning. I tried a different method using Trello, but that didn’t really help
me that much, what I think works is just a simple excel sheet that shows what’s
not done. This would be more useful as it would give a better direction
whenever I feel like not knowing what to do. I think also having clear
deadlines for each part of the process would give me more motivation


No comments:
Post a Comment