Week 2 - Composition & Modeling
I feel as though I don't have much to show for this week. Because I haven't necessarily learnt something new or went deeper into UE4. However I have done something and its an important part of the project.
Something that I struggled with in my last project is composition and narrative. My focus was on learning technical aspects that lead to me overlooking the more core principles of an environment: Compostion, Shape Language, and Narrative.
This time round I wanted to sharpen my skills and prove that I can successfully create an environment with a clear composition and an understandable narrative.
Following on from the draw overs I made last week I started to model out the entrance of this bunker. Unfortunately I made the mistake of not taking a lot of screenshots of the process, but I can break down what I've done.

A lot of the models were quite primitive shapes at first. I got them into UE4 as soon as possible, so that if I keep iterating on the models I could just re-import them and they will stay in the same position. After placing the models into their positions, I worked on adding finer details such creating the relief of the door in the wall. Or creating the hole in the supporting structure to allow a ladder through.

After getting the overall composition down and the models in the scene I started focusing on creating the high poly meshes for my focus areas.
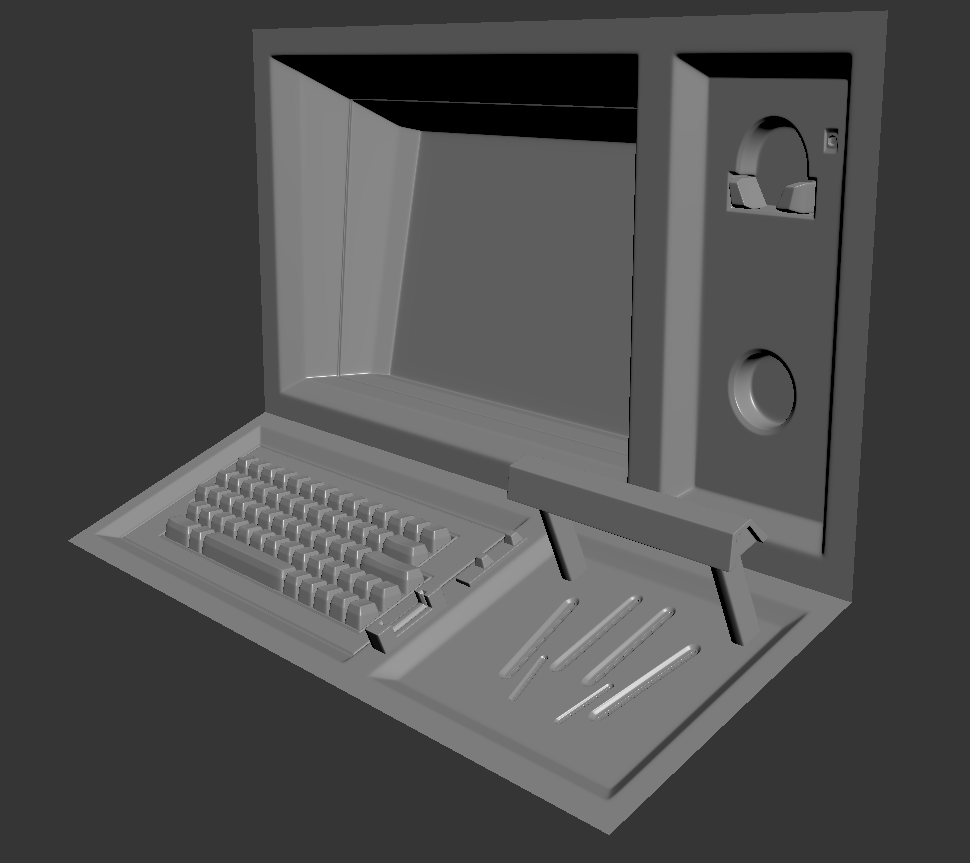
This is the entrance terminal to the bunker. It's basically a bash of a few ideas together. My thought process for this terminal is that its a high security bunker, so they would most likely have multiple layers of security to get in.
First you would slot in your ID card.
Then you would type into the computer.
And finally you would probably have some sort of scan either fingerprints or retina.
Additionally if the computer is broke or the door doesn't open, you would need to phone for technical help which is why there is a phone.
So with this frame of thought I found references for each stage.

MDT9100 is a car interface. Very retro with large keys.


This is interestingly called a Indentimat, from information I could find online its supposed to be a hand geometry scanner for the infamous F-117 Nighthawk stealth attack program. Although people now link it to the Area 51 conspiracy, that this scanner is used to get into top secret locations in Area 51. I don't really care about this scanners purpose or history, I just really like the shape language.
Along with these references, I also looked at the Nostromo in Alien.

The ID card slot. And some flashing buttons.

Closeup of the phone.
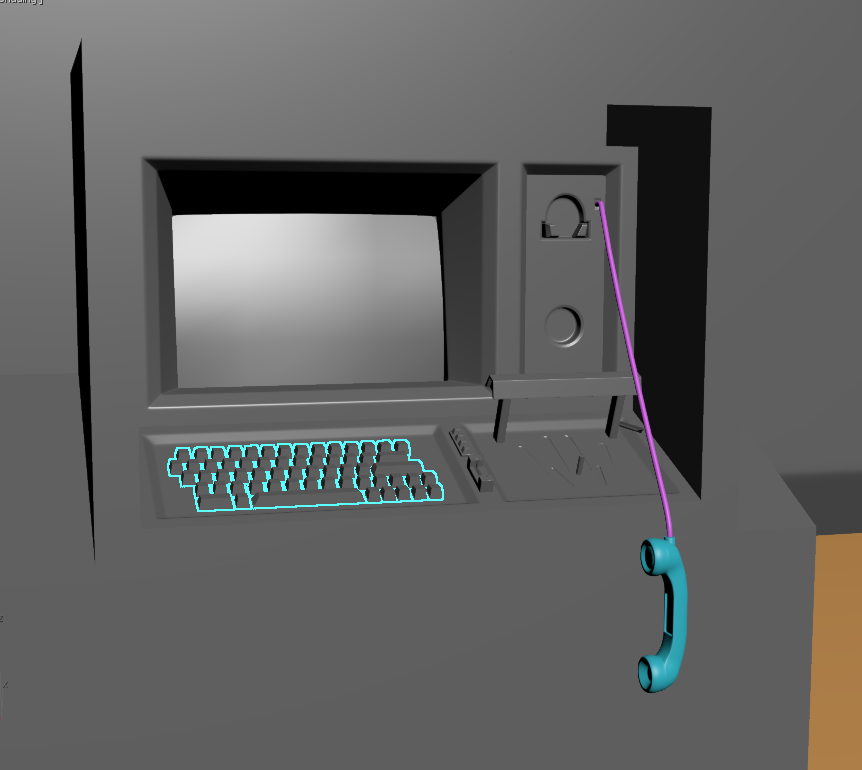
Some of the narrative I wanted to tell is that this person who was killed, desperately tried to get into the bunker. To convey this I had the phone hang down off the line.
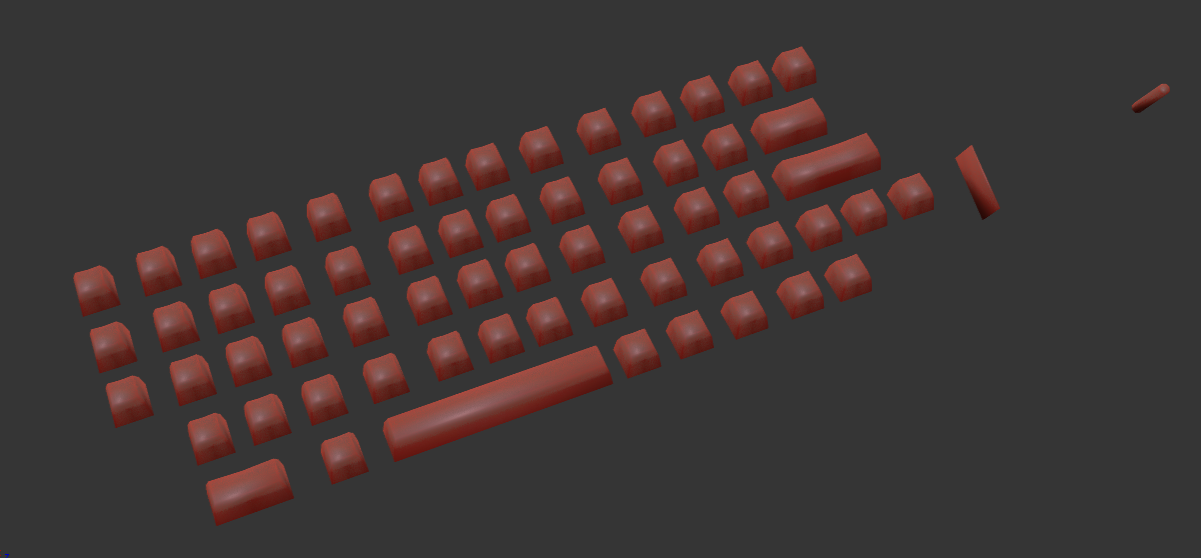
Since this entrance terminal is practically the only object with unique textures, I thought it would be important to get this prepped for baking and texturing as soon as possible, as I can find making unique textures takes longer than making tile-able textures. This is because of getting a good bake result. With the Unwrap I tried to be as efficient as possible, having all the keys in the keyboard to be aligned on the V axis, to make it easier to texture later.

After unwrapping I prepared my model for baking by using a technique called explosion bake, this requires the geometry of the model to be separated by a large distance, this gives space between the cages of the mesh so that there isn't any artifacts caused by overlapping cages.
The other method is to bake by mesh name, which requires you to detach every single mesh and give it a unique name, and give the high poly the same name.
There are tools that can explode the mesh for you, however I did this manually since this was the first time I've ever tried explosion baking.


Here's everything together below.


Something to notice as well is that the Screen is not present. The reason for this is because I have separated the screen entirely so that I can do some animated textures and some other cool stuff with it.
The last thing I did this week was finalize the concept of the environment. There were small details that I wanted to have which would make the environment that much more believable, such as the icicles on overhanging surfaces, or the emergency red lights.
The major goal I wanted to figure out was the colour scheme. Some critique I was given was that my scene was quite boring since there was just concrete and metal, which are both quite dull colours. And that I should add a splice of colour. I was looking at Doom 2016, and I noticed that there was a splash of colour that was used to direct the player, and to break up the monotony of the metal and plastic.

And here is the rough colour concept.

I think a piece of advice that I need to remember for future projects is to go off of other peoples concepts, because I spent a lot of time figuring out everything about this scene, when all of that could be spent on production. And although its great that I can create something original, realistically I won't be able to do this when I am working for a studio.
Since this entrance terminal is practically the only object with unique textures, I thought it would be important to get this prepped for baking and texturing as soon as possible, as I can find making unique textures takes longer than making tile-able textures. This is because of getting a good bake result. With the Unwrap I tried to be as efficient as possible, having all the keys in the keyboard to be aligned on the V axis, to make it easier to texture later.

After unwrapping I prepared my model for baking by using a technique called explosion bake, this requires the geometry of the model to be separated by a large distance, this gives space between the cages of the mesh so that there isn't any artifacts caused by overlapping cages.
The other method is to bake by mesh name, which requires you to detach every single mesh and give it a unique name, and give the high poly the same name.
There are tools that can explode the mesh for you, however I did this manually since this was the first time I've ever tried explosion baking.

Here's everything together below.


Something to notice as well is that the Screen is not present. The reason for this is because I have separated the screen entirely so that I can do some animated textures and some other cool stuff with it.
The last thing I did this week was finalize the concept of the environment. There were small details that I wanted to have which would make the environment that much more believable, such as the icicles on overhanging surfaces, or the emergency red lights.
The major goal I wanted to figure out was the colour scheme. Some critique I was given was that my scene was quite boring since there was just concrete and metal, which are both quite dull colours. And that I should add a splice of colour. I was looking at Doom 2016, and I noticed that there was a splash of colour that was used to direct the player, and to break up the monotony of the metal and plastic.

And here is the rough colour concept.

I think a piece of advice that I need to remember for future projects is to go off of other peoples concepts, because I spent a lot of time figuring out everything about this scene, when all of that could be spent on production. And although its great that I can create something original, realistically I won't be able to do this when I am working for a studio.
No comments:
Post a Comment